Most people train martial arts for self-defense ...
As you may know, there are a huge number of different martial arts, but the question is, are all martial arts effective and can they really help you defend yourself in a street fight or when you are suddenly attacked?
The answer is NO!
There are skills that simply cannot prepare you for real-life situations that happen on the street and are likely to hurt you.An example of this are Eastern skills like aikido, kung fu and similar skills.
The problem with these skills is that they have remained originally the same since they were created.Also, these skills require you to learn movements and procedures that require your opponent to stand in a certain position and attack you in a certain way in order to defend yourself.Some skills require several movements to make a simple attack, which is very complicated and difficult to apply in reality.
The greatest fighters and martial arts experts say that the best and most realistic skills are those that prove useful in the martial ring and octagon.So, if you are watching MMA, and UFC fights, all the techniques used here are useful and can help you defend yourself, as they prove to be the best in situations that are most realistic for a street fight.
So boxing, jiu jitsu, wrestling, kickboxing, certain karate kicks, judo, krav maga, certain taekwondo kicks and of course mixed martial arts are the ones that can allow you to defend yourself against attackers.
Bruce Lee, one of the greatest legends of modern times, coached kung fu for years, telling himself that such a skill could not be realistically used in real street fighting, so he created a skill called jeet kune do, which was the forerunner of modern MMAstyle.
In the video clip below, take a look what happens when aikido master meets a professional MMA fighter.You will see for yourself that his wrist-throwing and throwing techniques can hardly serve when your opponent kicks and hits you in the head and body.
If you have a bad posture it may be easy to admit defeat and accept the slouch, but the good news is that there are effective exercises to reverse the effects of bad posture and help strengthen your back and neck muscles.
Bad posture is more than just an aesthetic problem, you’ll also be putting your body under unnecessary stress and inhibiting your muscle gaining potential. Every inch your head moves out of alignment puts an extra 10 pounds of pressure on your neck and upper back muscles. Considering that on average a head will weigh 12 pounds, that’s one hell of a strain.
You’ll also want to ensure that you are maintaining your natural lumbar curve in the lower back, before we start with the exercises you’ll need to perform daily for the best results, it’s imperative to understand the importance of breaking up long periods of sitting down by getting up and moving. This is especially important for office workers or people who spend a fair amount of their time staring at their phone.
6 Tried and Approved Exercises to Fix Posture
1. Reverse Tabletop
Sit with feet flat on the floor, knees bent and your palms behind you with your fingertips pointing towards your hips. As you inhale, gently press into your hands and lit yourself from the floor and extend your hips to the ceiling. As you exhale pull your shoulder blades together to stretch your chest whilst slowly and carefully lowering your head and tilting your chin. Hold this position for 30 seconds and repeat until you’ve stretched for a total of sixty seconds.
2. The Cat-Cow Stretch
Get on all fours, place your writs in front of you in alignment with your shoulders and your hips in alignment with your hips keeping your toes tucked under. As you inhale relax the abdominal area until it moves towards the floor, then gently arch your back by tilting your tailbone and chin towards the ceiling. As you exhale, round your spine, pull your chin to your chest and untuck your toes. Repeat the back and forth movements x 10.
3. The Bird-Dog Stretch
In the same position as the Cat-Cow stretch start on all fours, tuck your right toes under and slowly extend your right leg behind you. Then lift your leg to hip height, keep your balance by bracing your core and reaching your left arm forward up to shoulder height and keep your thumb pointed towards the ceiling. Hold this position for no longer than 8 seconds. Repeat to the original starting position and repeat with your left leg and right arm. Complete 8 reps on each side.
4. T-Spine Mobility in Childs Pose
Get onto all fours, adopt the child’s pose by sitting on your heels. Cradle the back of your head with one hand with your elbow pointing downwards then rotate your chest and elbow until your elbow points to the ceiling. Hold this position for 5 seconds before going back to the starting position. Complete 8 reps with both arms.
5. Doorway Stretch
Stand in a doorway, lift your arm and bend at the elbow, your fingers should be pointing at the ceiling. Lean your raised arms and push against the door frame for 10 seconds, relax the pressure then press your arm against the doorframe whilst in a lunging pose. Repeat x 3 with each arm.
6. Hip Flexor Stretch
Kneel on your right knee with your toes facing downwards, put your left foot on the floor directly in front of you. Place both hands on your left high and press forward with your hips until you feel the muscles stretching. Tense your abdominal muscles and slightly tilt back your pelvis. Hold this pose for 40 seconds then switch legs.
When you go to the gym, you see spaces and equipment to help you work your core, your arms and your legs, but nowhere in sight is the apparatus that will help a lot of men deal with a common problem area; their chin.
Somehow, we all fell under the belief that correcting a double chin could only be done via cosmetic surgery. When really, there are six simple exercises which could help you reduce or eliminate the submental fat which causes the double chin.
Whilst a healthy, well balanced diet certainly helps when it comes to losing a double chin, it is worth remembering that double chins aren’t always only due to weight gain.
As men age, the skin naturally gets looser, and genetics can also play a major part in how our chin stands against the test of time.
Whilst losing your double chin with exercises is entirely possible, patience is key to this regime. You won’t see your double chin gone over night, and you’re going to find out how exhausting chin exercises can be!
Each one of the exercises below will need to be practiced 10-5 times daily. Yes, daily.
Exercise 1: Straight Jaw Jut
• Tilt back your head and look up
• Push your jaw forward until you feel your chin stretch
• Hold for 10 seconds then relax.
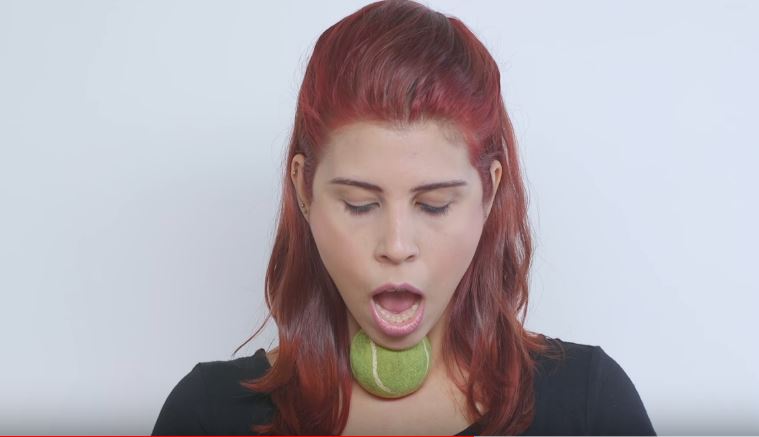
Exercise 2: The Tennis Ball
• Place a tennis ball under your chin
• Press the ball into your neck with your chin
• Repeat this 25 times daily
Exercise 3: Pucker Up
• Tilt back your head and look toward the ceiling
• Purse your lips stretch the area of skin under your chin
• Relax and bring your head back to a comfortable position
Exercise 4: Tongue Stretch
• Stick out your tongue as far as you can
• Try to touch the tip of your nose with your tongue
• Hold for 10 seconds then release
Exercise 5: Neck Stretch
• Tilt your head back
• Press your tongue against the roof of your mouth
• Hold for 10 seconds and release
Exercise 6: Bottom Jaw Jut
• Tilt your head back and turn to the right
• Slowly slide your bottom jaw forward
• Hold for 10 seconds
• Repeat process with your head turned to the left
As with any work out routine, you will want to make sure that you are complimenting that regime with the appropriate diet. Whilst diet alone is sometimes unable to get rid of double chins, it certainly can’t help if you’re already dedicated to the work outs.
There is no ‘special chin-diet’ to follow per se, the general rules apply to staying fit and lean:
• Make fruit and vegetables one of your major food groups
• Avoid processed sugars and fried food
• Don’t avoid all fats! Only take in healthy fats from avocado’s nuts and olive oil
• Only opt for lean proteins such as fish and red meat
• Only consume low-fat dairy
And we really can’t overestimate again how important patience is on this journey.
Muscle imbalance occurs when one group of muscles - for example, chest – is unequal strength or size in relation to the opposite group of muscles - for example, back. These differences in muscle function can diminish the results of your effort in the gym, but also create serious injuries. When one muscle is weak and the other is too active, your body reaches into poor posture - like rounded shoulders or excessively curved lower back - which also limits the mobility of the joints and cramps certain muscles.
Typically, muscle imbalances occur in areas of your body that should be moving, such as hips, shoulders, and the chest part of the spine - but they can occur almost anywhere. What does it look like when you have a muscle imbalance and how will you recognize it? Read on to find out the four most common muscular imbalances, quick check of the condition, and how to fix them.
Symptom: rounded shoulders
Test
Take a look at your upper body without clothes pictured from the profile - if you see any part of the upper part of your back, you have rounded shoulders. The problem is that we spend too much time behind the computer, and in the gym we insist on the chest, so our chest muscles strengthen and lower our shoulders forward.
Start strengthening the muscles of your back and stretch your chest. Do only one breast exercise per week during the month, and focus on the following exercises:
Balance yourself
Chest-supported dumbbell row
Place the adjustable bench on the short slope and lie with face down with the dumbbell in each hand. Start the movement by pulling the shoulder blades and row. Do not allow your elbows to pull away from your chest. Wide-grip inverted row
With wider grip, hands will do less work, while neglected middle-back muscles will do more. Place the bar for a two-handed weight on a dead lift or Smit's device, swing from below and pull your chest to the bar. Pin your shoulder blades together and hold your body straight just like a plank.
Doorway pec stretch
Stand by the door with your hands above your head, make an angle of 90 degree with your elbows and hold the forearm on the door. Tilt forward and stretch your chest muscles.
Symptom: Sway back
If you have rounded shoulders, you're probably have sway back too. This requires a different group of corrective exercises compared to those for the rounded shoulders. In addition to previous exercises, you need to work on the return of flexibility and mobility of the chest part of the spine. Use these stretching exercises before the next training session.
Balance yourself
Cat-camel
Step into the four-legged position with your knees directly below your hips and arms straight under your shoulders. Now, push the center back as far as you can and make a bow like a cat when exhale. This pose in the yoga is called a kneeling cobra. Then lift your back up so that it look like a camel's hump.
Segmental T/S extension
Lie on your back. Place the foam roller below the middle part of the back. Put your hands behind your head, hold the buttocks on the ground and pull your body back over the roller, keeping the neck straight.
Symptom: Anterior pelvic tilt
Anterior pelvic tilt occurs when your pelvis leans forward causing an excessively curved back and rounded shoulders.
Test 1
When you wear a belt that fits well, where is the buckle centered? If it's pointing down and not straight ahead, you have anterior pelvic tilt.
Test 2
If your back hamstrings is always taut compared to the quads before, during, and after exercise, you probably have anterior pelvic tilt.
With a anterior pelvic tilt, your back hamstrings is taut because it always works to prevent the pelvis from leaning forward. This causes problems with the lower back and even stretches the rear logs. Instead, put the pelvis back into neutral alignment and release the back hamstrings, the gluteus will work properly, and the lower back will calm down.
Balance yourself
Hip flexor/Rectus femoris stretch
Kneel on one knee and place the back leg on the bench behind you. You will feel deep stretching through the front of the hips and the quads. Squeeze the gluteus of the hind leg and hold it for 30 seconds. Change legs.
Deadbugs
Lie on your back with your hands and knees in the air. Raise the butt from the ground, but so that your lower back remains on the ground. Touch the opposite hand and leg while holding the starting position. Change sides.
Symptom: Forward neck
When you go through the door, what passes first: head or chest? If it’s your head, then the head and chin are probably set low, and your neck is pushing forward.
Having a head that moves forward causes neck problems: for each centimeter that your head moves forward, add another 5 kg that your neck needs to support. Instead, strengthen the neglected muscles deep in the neck with this simple exercise.
Balance yourself
Quadruped chin tucks
Take a four-legged position and pull your head down. Now, pull your neck out from below, keeping the same head position. Now lift your head and neck holding your chin deeply drawn.
Lower back pain is known to last for days, preventing normal functioning, and no medication can help.
This pain most commonly occur in people aged 20-40, affecting almost 60% of the population. The most common causes of pain in the lower part of the back are: back injury, excessive sitting, lack of physical activity, pressure on the nerves (herniated disc, osteoarthritis, distorted spine), compression fracture (the consequence of strong pressure on the sponge bone).
The good news is that by exercising, you can reduce, even completely remove back pain.
We suggest what exercises you can do at home to reduce pain, but first of all, it is better to consult with your doctor in order to avoid major injuries.
Many good tips like these can be found in Sciatica Healed video coaching sessions.
Starting position: Kneel at the elbows and knees, with knees parallel to the hips and arms parallel to the shoulders. Do not overwhelm the bow to the lower part of the back. Keep the neck stretched, pull the shoulders backwards and do not block the elbows.
Exercise: Slowly pull your butt backwards, keeping the natural spine curve until you sit on the heels. Stay stretched until you take one deep breathe and then return to the starting position.
Repeat: 8 to 10 times.
Tips:
Avoid sitting on the heels if you have a problem with your knees.
Ensure proper positioning with mirrors.
Take it only to the extent you feel comfortable.
Lower-Back Twist
It stretches and mobilizes the spine.
Home position: Lie on your back. Place a small pillow or book under your head so that it is in the level with your body. Keep your knees bent and legs together. Keep the upper part of the body relaxed, and the chin is slightly drawn.
Exercise: Move your knees to one side and then to the pelvis, holding both shoulders on the floor. Stay stretched until you take one deep breathe and then return to the starting position.
Repeat: 8 to 10 times.
Tips:
Take the movement only to the extent you feel comfortable.
Place the pillow between the knees for extra comfort.
Stretching back
It stretches and moves the spine backwards.
Home position: Lie on your stomach and slide to your elbows, stretching your spine. Slide your shoulders back and stretch the neck in the level with your body.
Exercises: Holding the stretched neck, spin back back so that the burden is completely on the hands. You should feel a slight stretching in the muscles of the stomach when you swing back. Breathe deeply and stay for 5 to 10 seconds. Return to the starting position.
Repeat: 8 to 10 times.
Tips:
Do not bend your neck backwards.
Hold the hips firmly against the floor.
Deep stretching of the stomach muscles
Stretching deep muscles supporting the spine.
Home position: Lie on your back. Place a small and flat pillow or book under the head, so that it is in the level with the body. Curl your knees and spread your legs in the width of the hips. Keep the upper part of the body relaxed, and the chin is slightly drawn.
Exercise: As you exhale, tighten the muscles of the pelvis and lower abdominal muscles, as if you had an imaginary zipper along the stomach. Hold this gentle contraction and breathe out of your stomach, lasting 5 to 10 breaths, and then relax.
Repeat: 5 times.
Tips:
• This is a slow and gentle way to tighten the lower abdomen. Do not strain these muscles using more than 25% of your maximum power.
• Make sure you do not stretch your neck, shoulders or legs, as this is not recommended.
The Pelvic Tilt
It stretches and strengthens the lower part of the back.
Home position: Lie on your back. Place a small and flat pillow or book under the head, so that it is in the level with the body. Curl your knees and spread your legs in the width of the hips. Keep the upper part of the body relaxed, and the chin is slightly drawn.
Exercise: Gently affix the pelvis to the floor and tighten the abdominal muscles. Now pull the pelvis to the heels until you feel the slight bow in the lower part of the back, feeling pressure in the back muscles and then return to the starting position.
Repeat: 10 to 15 times, moving the pelvis forward - backward in a slow swing movement.
Tips:
Do the exercise with deep muscles of the lower abdomen.
Make sure you do not stretch your neck, shoulders or legs, as this is not advisable.
Modification of the exercise:
Put one hand on the lower stomach and the other under the pelvis, to feel the work of the appropriate muscles.
To get rid fat from the stomach is definitely the hardest fitness task you can try. Men who do not care about diet and those who do not practice sports can have serious problems with weight, and the most critical part of the body is just a stomach.
If you drink regularly, you must have noticed that your stomach started to increase in relation to its normal size. You're probably on your way to earning a beer belly! One of the reasons for the development of beer belly is the regular use of alcohol, especially beer. As it contains high calorie levels, these calories tend to accumulate around the waist and abdomen, and thus the term "beer belly" has emerged. The beer belly most commonly occurs in men, as some male hormones tend to induce fat to accumulate around the stomach. Having such a huge stomach is uncomfortable, and most importantly, you are exposed to many cardiovascular diseases. Therefore, it is important to fight the beer belly at an early stage, although it is never too late.
So, what needs to be done to take a fat from the stomach for a short period of time.
First and foremost, you need to reduce the habit of drinking and limit them once or twice a week. Eat less calorie things to lose more pounds in less time. When you start with a diet, exercises are next on the line. The next step would be to perform basic fat burning exercises on your stomach to get that flat look.
We advise you to do these stomach exercises because they are the most convincingly the best for removing fat.
There is nothing like running or a quick walk to get rid the beer belly. This not only helps to lose the beer belly, but also regulates the entire body system. Running or fast walking can burn almost 900 calories per hour. If you start a day by jogging or by taking a quick walk, your metabolic activity will increase and help you quickly get rid of excessive fat in the stomach area, provided that you are consistent in it.
Driving a bicycle
When you get fat, your poor knees have to bear the burden, which can lead to different knee problems. Biking can help alleviate the problem with your knees, as well as the beer belly. Even a slow ride on the bike helps to burn more than 500 calories per hour. The faster you drive, the more calories you burn. You can also try driving along the hill; It is a great way to increase exercise intensity, loss of calories, and strengthen knee muscles.
Reverse Sit ups
This is a great but also demanding exercise that will have a big impact on the lower part of your stomach. Lay on the floor on your back, bend your legs slightly in your knees and lift them up. Now head down to the floor, hold a few seconds above the ground and return to the starting position. You will feel the effort in your stomach.
Hold on in plank
This is another important exercise that will do miracles to your stomach. All you have to do is stay in the top position of the plank, the longer you can. Endurance exercises will make it easier for you to move on daily basis, whether it's about day-to-day activities or a serious sport engagement. You will enhance the whole body, abdominal muscles, hips and buttocks, which are engaged throughout the exercise.
Stay in plank for 30 seconds.
Touch your toes
Leave this exercise for the end. Just try to tilt your fingers to your feet without bending your knees. Do 20 reps.
Other exercises for removing beer belly
If you combine the abovementioned exercises together with other underlying exercises such as abdominal, home-made bicycle, sitting abdominal, abusive abdominal, squatting, leg lift, stomach twisting, side swings, and so on, you will surely notice dramatic results in the removal of beer stomach. However, these nocturnal exercises will not help reduce the stomach, but it will definitely tighten and strengthen the abdominal muscles. Increase the number of repetitions gradually and this will help build your abdominal muscles better.
You can get rid a beer stomach just by applying a strict discipline as far as food and drink are concerned. Take effective exercises to eliminate beer belly and try to follow the exercise regimen religiously.
If you have "love handles" or fat around the waist, you know that it's difficult to get rid of that fat. These seven exercises will help you in this.
Start with foodLower back fat can not be removed only with the diet, but you should certainly pay attention to what you eat. Reduce the intake of sugar, salt and fast food as much as possible, and replace them with fruit and vegetables. To get rid of fat from this part of your body, you need to eat healthy, consume less calories and be physically active.
Stress and sleep
Another important step in the fight against "love handles" is to get enough sleep and avoiding stress situations whenever possible.When
you are stressed, the body produce a lot of adrenaline and cortisol,
which leads to the fact that everything you eat "stick" just for
this part of the body. Research shows that if you are
sleeping enough - between six and eight hours - you have a double
chance of succeeding in your efforts to lose weight.
Physical activity
If you want to remove the lower back fat, let your exercise become your everyday activity. There
are exercises that are aimed at removing the fat from this part of the
body, but that does not mean that you should only do them - so be
physically active, at least walk as much as you can.
Directions: Start with your feet at hip-width distance, holding dumbbells in front of your body with palms facing in to thighs. With slight bend in knees, lead with the chest and push your hips back to lower weights down in front of the legs. Lower to mid-shin, then return to start for one rep.
Reps: 10 to 12
2. Dumbbell Front Squat Directions: Start with feet slightly wider than shoulder-width apart, holding a barbell in the front rack position. Push your hips back, sit into squat, bringing thighs below parallel to ground. Push through heels to return to start for one rep.
Reps: 10 to 12
3. Chin-Ups Directions: Hang from pull-up bar with an underhand grip, hands slightly wider than shoulder width. Pull your body up until chin clears bar. Lower back to start for one rep.
Reps: 10 to 12
4. Rotational Ball Slam Directions: Stand with your feet hip-width apart holding a medicine ball with knees slightly bent. Raise the ball so it's straight overhead. Use your core to bring your torso and arms downward as you slam the ball into the ground about 2 feet to your right. In the finish position, your torso should be parallel to the ground and your arms should be behind you. Retrieve, then repeat on the opposite side for one rep.
Reps: 10 to 12
5. Sprints Directions: Do you REALLY need us to explain this one to you? Let’s hope not.
Reps: 8 minutes on the treadmill at 30 seconds on, 30 seconds off
6. Single Kettlebell Farmer's Walk Directions: Start with feet at hip-width distance, holding kettlebell on one side. Walk forward 30 yards without swinging bell, engaging core. Switch to opposite side, and return to start for one rep.
Reps: Four 30-yard lengths
7. The Push Away Directions: “This move requires both hands on the edge of the table, from there fully extended your arms, stop eating and push away from the table once you're done eating,". "Go on, you can do it.”
Almost allraise the question ofwhere theycanfind"BeerYoga", and the authorsof this innovativetrendcorrespond tothevoice:"It iseverywhere,in a cafe,at festivals,atbirthday parties,ortoany other placewhere you candrink."
The philosophyis:
"It's fun,but it's nota joke.We used thephilosophyof yoga, which wepairedwithbeerin order to reachthe maximumlevel of our consciousness."
Eachtrainingincludesdrinking beerinyogaposes,and that means thatsometimesyoucan balancewith a bottleof beeron your headorto drinkasip and stay as long as possiblein a particularpose.
Sometimesthis meansthat the membersduring theworkoutdranktwobeers. (sometimes even more)
"Bothyogaand beerarethousands ofyears therapyfor the body,mind and soul.Joy of beerand awareness, flexibilityand balancethatis achievedwith the helpof yogatogethercomplement each otherin order toraise the levelof energy and health," it saidon the website.
Doesbeer have too manycaloriesfor thistraining?
Andthis questionhasa good answer.
"Moderatedrinking ofbeerhas many advantages-it is goodfor the heart,protectsusfrom diabetes,cleansourbody,butfew people know thatoncebeerwasthe perfectdrinkfor people torelaxaftera marathon.Itis goodif you are notoverdoing it."


.PNG)